Monday, April 8, 2013

Greetings friends! I am here today to proudly introduce my newest project, the lipstick board and the love jar. These are two separate DIY projects stemmed from the same idea. We will start with the lipstick board. What you'll need is wide paper (preferably colored wrapping paper), mini slips of colored paper, white slips of paper, tape, a sharpie, and lots of lipstick. 


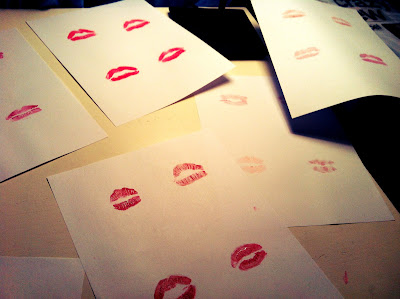
The first step is to apply the lipstick to your lips and kiss the paper in rows of two.


Step number two is to cut out all of your kisses and organize how you want to place them on your paper.


Step number three is to tape the white paper to a slip of the colored


Tape all the slips of colored paper in rows evenly. And finally add the letters either written or typed "Mwah" to make an adorable kiss sound!


Well done darling, you have completed the project.


_______________________________________________________________

For our sister project, the materials need are a jar, 1 colored piece of paper, glitter, lipstick, a marker, and white paper.

Your first step will be to cut the paper to fit the jar.

Now, write "jar of love" on the paper and glue onto cap.

Your next step will again be to kiss and cut.


Next, toss in the glitter.


Now add the kisses and toss them around a bit.

And toss some more.


So cayyute!


Monday, April 1, 2013

Greetings to all of my viewers! Im so excited to introduce to you my newest DIY, the bleached leggings. I have dabbled around with bleach and clothing trying to create the vintage or galaxy look. That is not exactly what I was going for with this creation, but I like the way they turned out. All you'll need is a bottle of bleach and a pair of leggings (it works best with a darker color).


I went with a navy blue color. The process is extremly simple. Take the bleach outside and spray the leggings all over randomly, and leave outside to dry. After 10 minuts you will see the difference but make sure to wash or soak in a sink before you wear them(to get the bleach out the toxins). 

And here is my final product! (I got the lighter blue by soaking them in bleach a bit before i sprayed them. This step is optional.)


Wednesday, March 27, 2013

Jewelry Holder

Hello all of my fellow DIY lovers! I am so excited to have just finished a project I have been wanting to accomplish for a matter of time now. It is a jewelry holder made up of plates and candlesticks. Enjoy!


Step one gather your materials.


Step two is to paint the inside of both your candlesticks. This step is optional but I love the way mine came out.


Step three is to glue the bottom of both candlesticks to your selected plates and let dry.


Let dry for about an hour before adding jewelry.


And your done!


Saturday, March 23, 2013

Shadow Box

Hello everyone I am so excited to share my first blog official DIY project with you. I decided to start my blog off with something simple so I created a color blocked shadow box. It is an extremely small accessorie, but can do wonders for the overall aesthetic of your room. I choose brighter colors for my box as you can see in the picture below and it gives an enthusiastic feel to the corner of my room.


Step one of the color block shadow box is to collect all of your materials.

Step two is to paint the first part of your box. I choose the background, but the order really doesn't matter. I decided to use a total of three colors on my box. One on the outside of the box, one on the inside, and another for my found object, but two is also good.


The next step is to paint the box. Make sure to wait until it dries completely before you flip it over and paint the bottom. (I made that mistake)


After that, you can go ahead and paint your found object. I used an old bird house and just repainted it, but any trinket or toy you can find around your house will do. The more random the better! 


Next, I painted the inside of the box. This step is not necessary, but if you have some extra paint go for it!


And the final, and most important step is to place everything in your box! 


And VWALA!