Greetings friends! I am here today to proudly introduce my newest project, the lipstick board and the love jar. These are two separate DIY projects stemmed from the same idea. We will start with the lipstick board. What you'll need is wide paper (preferably colored wrapping paper), mini slips of colored paper, white slips of paper, tape, a sharpie, and lots of lipstick.

The first step is to apply the lipstick to your lips and kiss the paper in rows of two.
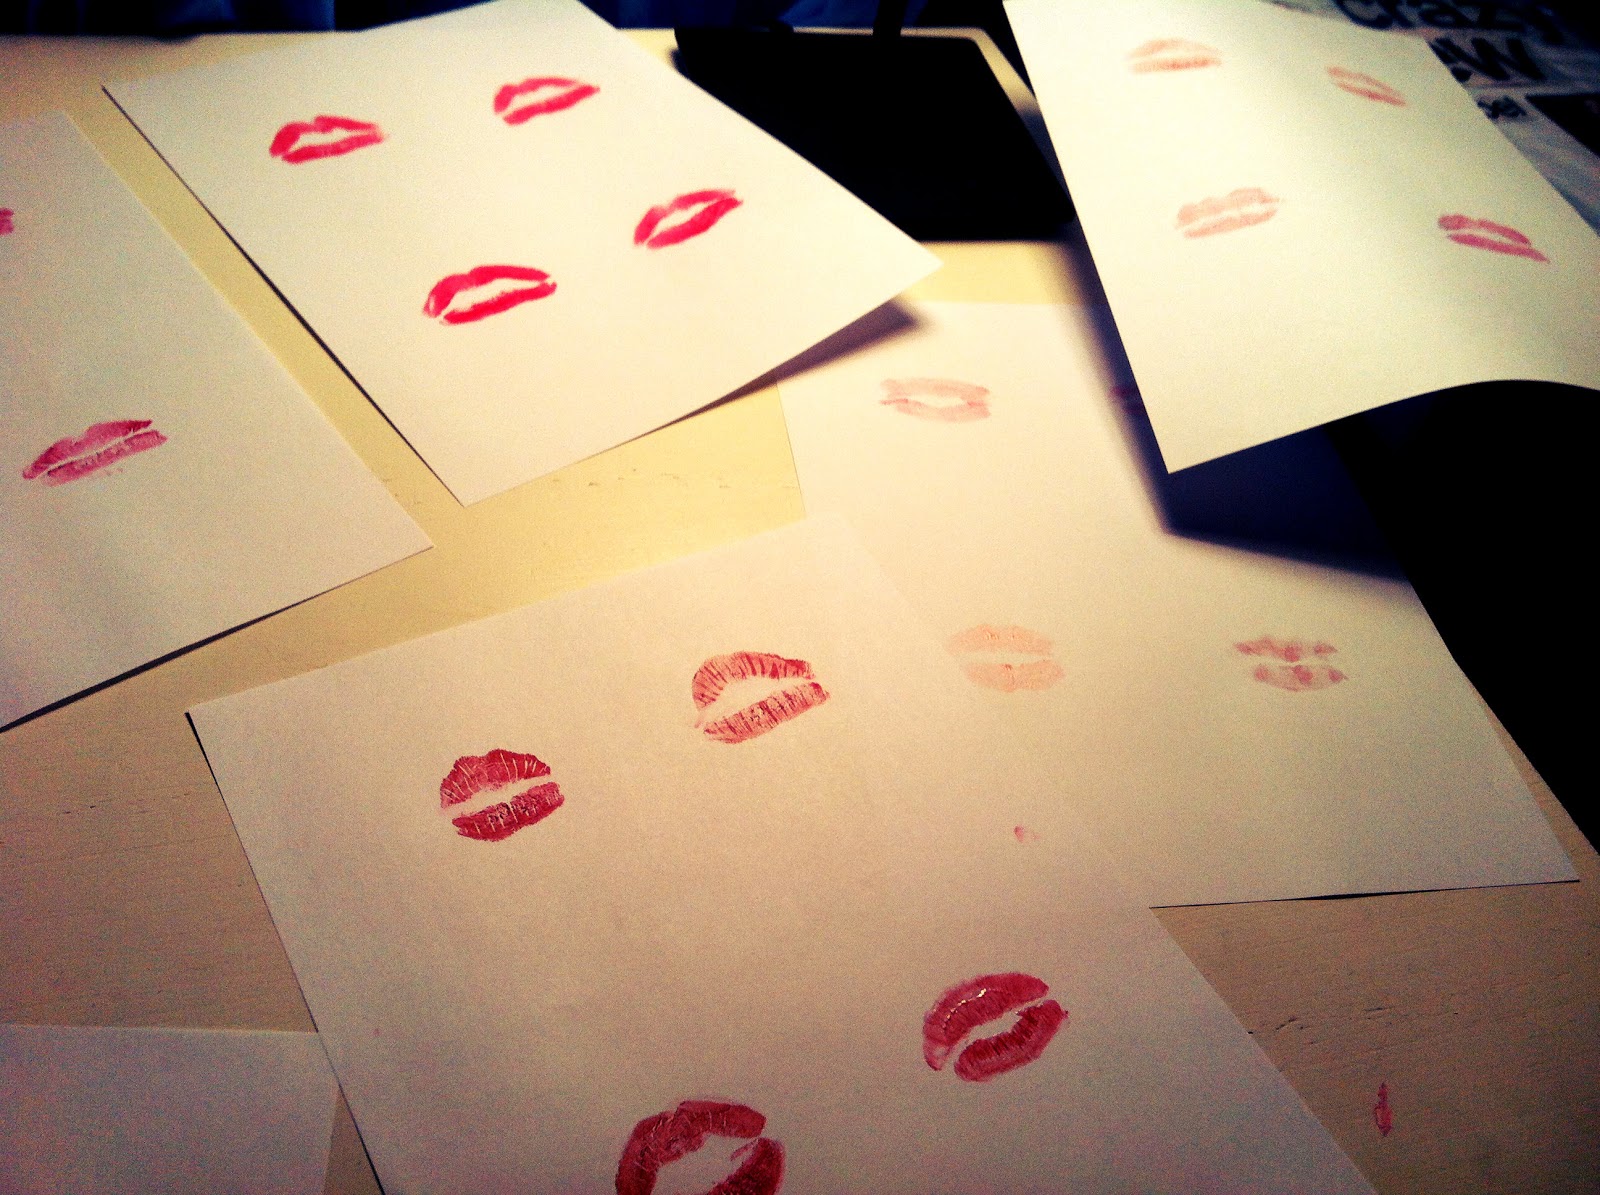
Step number two is to cut out all of your kisses and organize how you want to place them on your paper.

Step number three is to tape the white paper to a slip of the colored

Tape all the slips of colored paper in rows evenly. And finally add the letters either written or typed "Mwah" to make an adorable kiss sound!

Well done darling, you have completed the project.

_______________________________________________________________
For our sister project, the materials need are a jar, 1 colored piece of paper, glitter, lipstick, a marker, and white paper.

Your first step will be to cut the paper to fit the jar.

Now, write "jar of love" on the paper and glue onto cap.

Your next step will again be to kiss and cut.
Next, toss in the glitter.
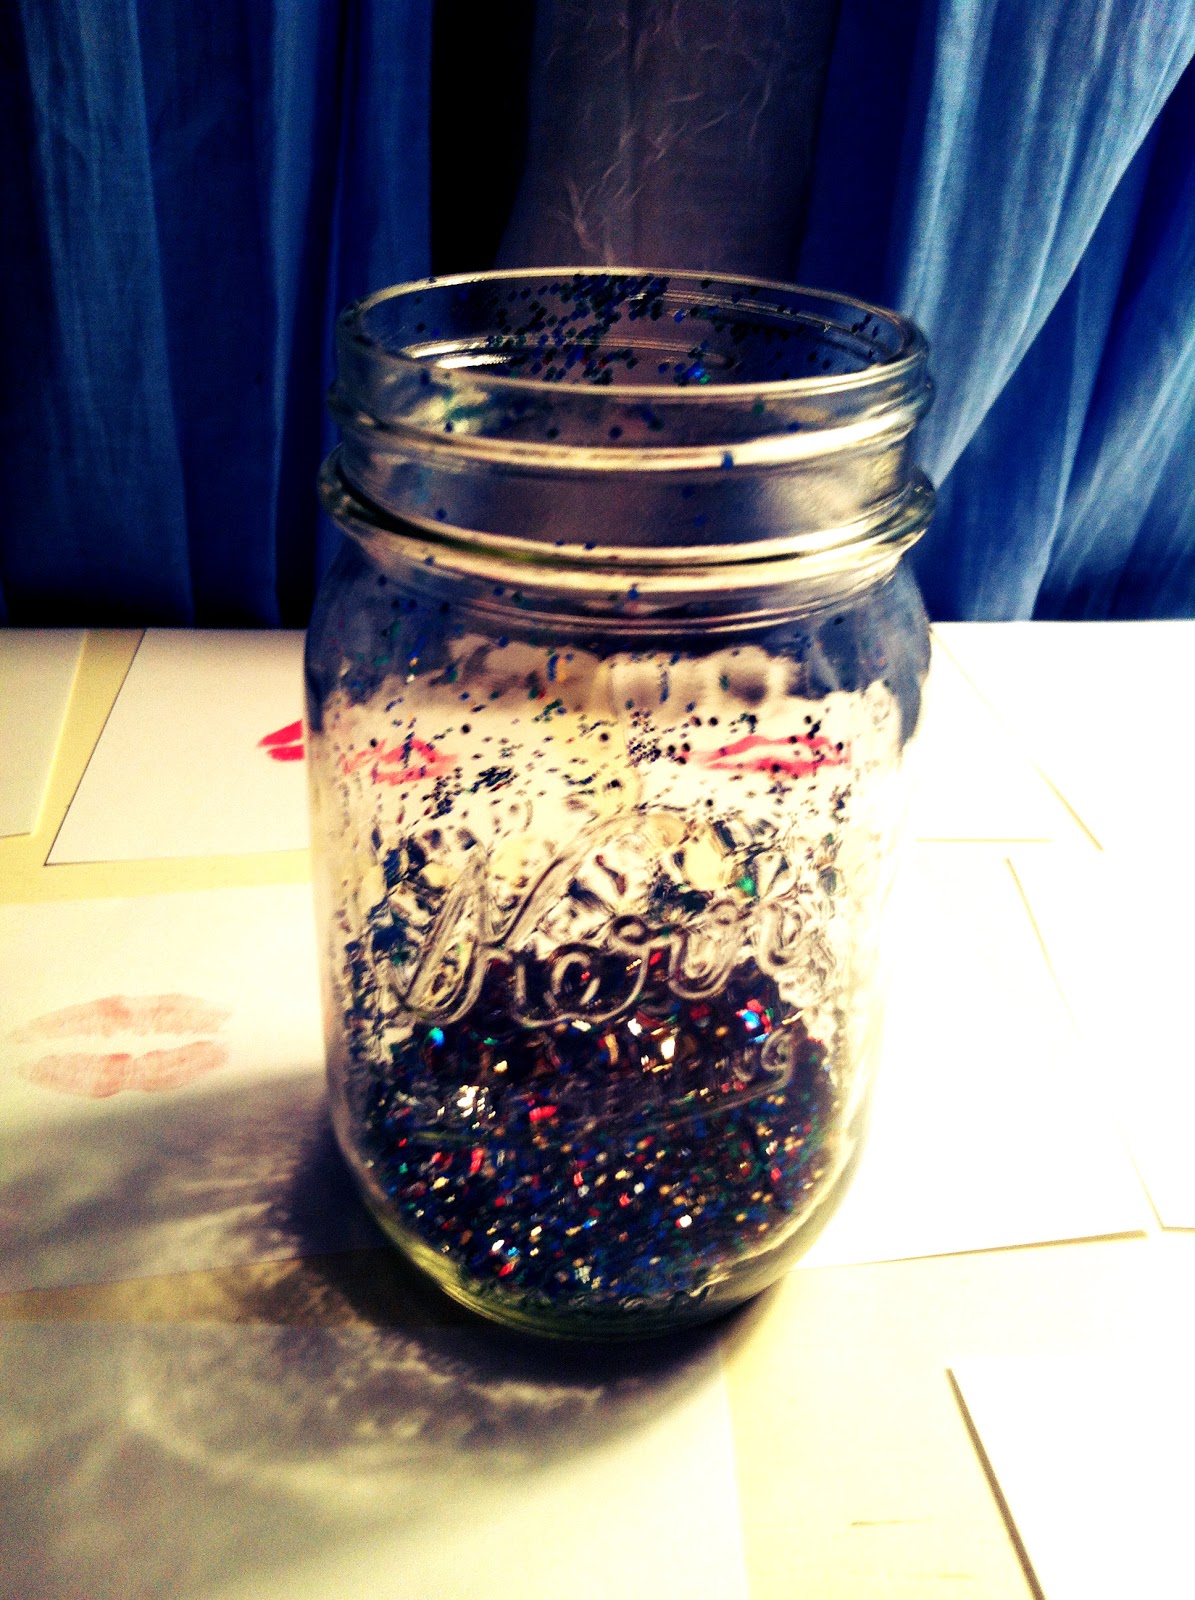
Now add the kisses and toss them around a bit.

And toss some more.

So cayyute!

